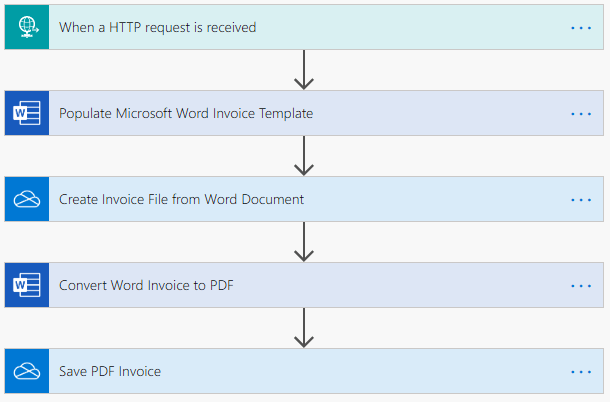
This post explains how you can create a PDF document using Microsoft Power Automate and a Microsoft Word Template. In this example the flow is being triggered by a HTTP request containing a JSON payload to generate an invoice. The five step flow follows this sequence:
- Receive data from a HTTP request containing a JSON payload.
- Populate a Microsoft Word Invoice Template.
- Create File (Word Document).
- Convert previously created Word document to PDF.
- Save the PDF File.

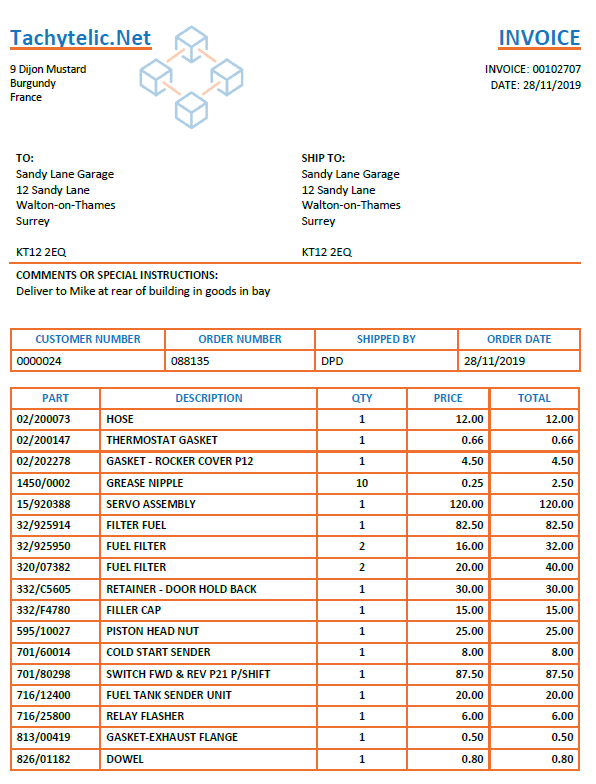
Here is the PDF produced by Power Automate (click here to see full PDF):
You can view the full JSON payload on Pastebin.
Create a Word Template for the PDF Invoice
The first thing you need to do, is build your word template. I used the Simple Sales Invoice in the Word template gallery as my starting point and modified the appearance to my liking.
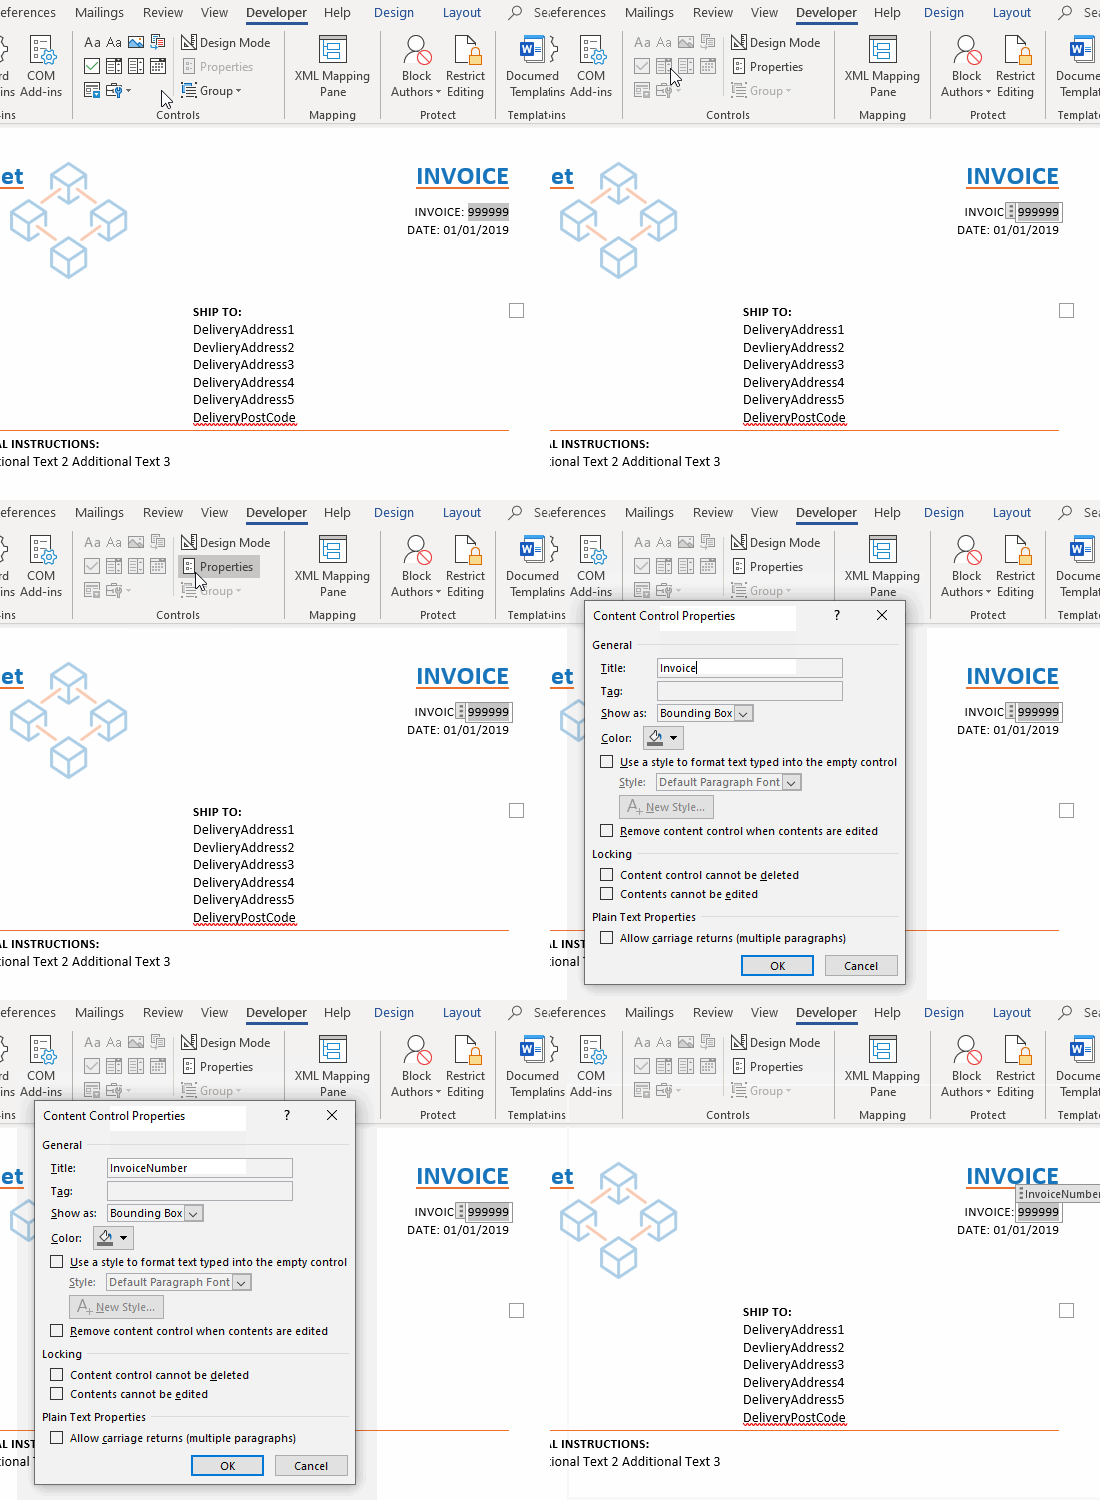
Next, add plain text control controls to the document for each of the fields in the JSON file that will appear only once (i.e. everything that is not part of an Invoice line). Do the following:
- Enable the Developer Tab in Word.
- Put the cursor into a table cell where your data needs to go.
- Enter some sample data into that cell.
- Highlight the sample data and click on “Plain Text Context Control” in the developer toolbar.
- Click on Properties in the control toolbar ribbon.
- Give the content control a meaningful name(preferably match it to your JSON field names).

Add Content Controls for repeating data
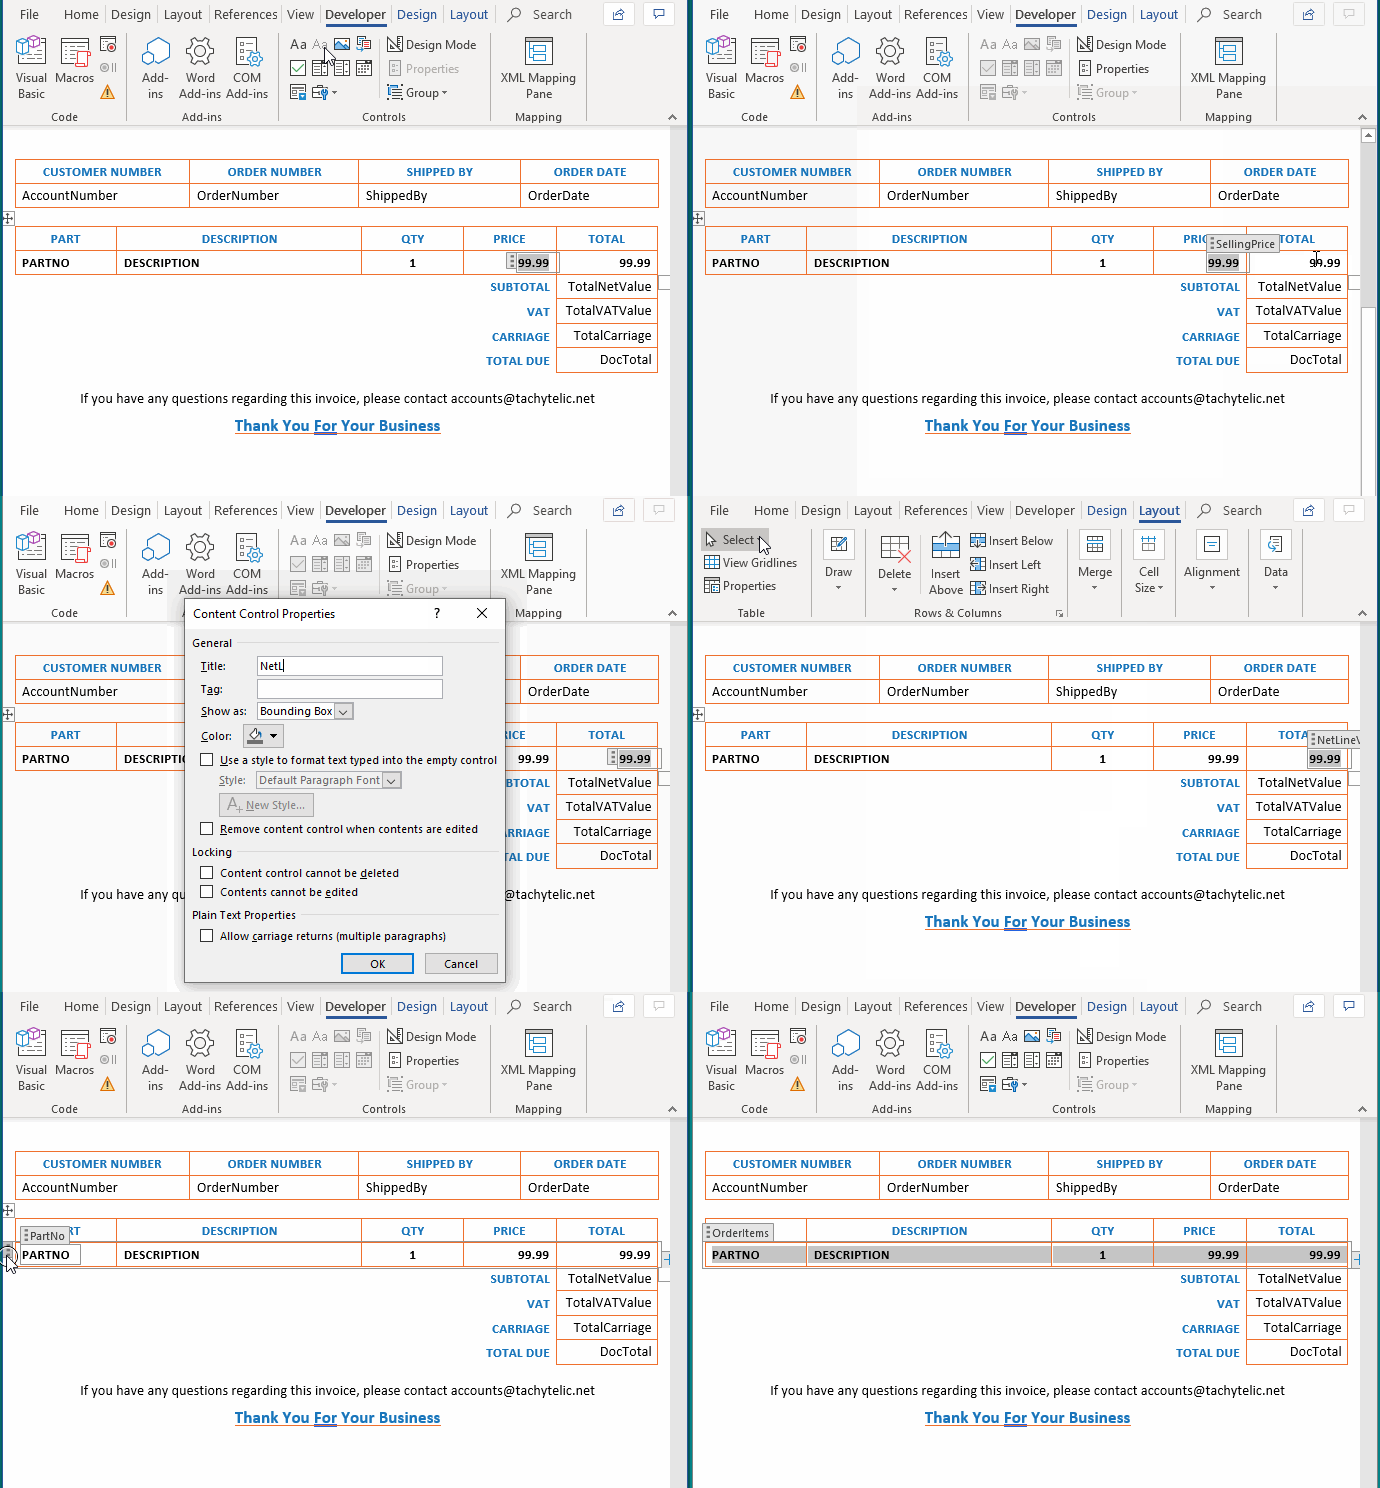
For the repeating data, follow the same procedure as above for each column of data in your table, but this time make sure the field names match the JSON field names. Then specify the row as repeating content like this:

- Select the entire Invoice line item row. I find it is easiest to go to the Layout tab and click “Select” and then choose “Select Row”.
- Go back to the developer tab and click on the repeating section content control.

- Name the repeating section with a sensible name.
In this example, the JSON for a single invoice line is like this:
{
	"PartNo": "813/00419",
	"Description": "GASKET-EXHAUST FLANGE",
	"ToInvoice": "1",
	"SellingPrice": "0.50",
	"DiscountPercentage": "0.00",
	"NetLineValue": "0.50"
}
Set Repeating Column Headers
My example data has quite a lot of invoice lines which do not all fit on a single page. So it is important to make sure that “Repeat Header Rows” is enabled. This will ensure the subsequent pages have column headings.
Select the top row of your Invoice lines table and go to the Layout tab and select “Repeat Header Rows”.

Now that you have finished editing the Word document. Save it somewhere you will be able to access it from Flow, such as OneDrive or SharePoint.
Create the Flow
The flow is really easy to build and in this example there are only five steps:
- Step 1 – Create a new flow
- Choose “Instant – from blank”
- Trigger the flow “When a HTTP request is received”

- When the flow editor appears click the “Generate from Sample” button within the HTTP Request flow part and paste in a sample of your JSON data and then flow will automatically generate the JSON schema which you will be able to use in the rest of the flow.
- Step 2 – Add the “Populate a Microsoft Word Template” action.
- Select the previously saved template file.
- Flow will read the document and present a list of fields to be added to the document.
- Go through each field and add them to the document, apart from the repeating fields.

- When you reach the line items block it will first appear like this:

- Click on the little box highlighted in red which switches the input to accept an entire array. Then you can select the array from your JSON file.
- Step 3 – Save the File
- Now your Word document has been populated you can save it somewhere that is appropriate for your environment (I used “Create file – OneDrive for Business).
- For the Filename I used “INV_” + Invoice Number from JSON File + “.docx”:

- Step 4 – Convert the Word Invoice to PDF using the path from the previous step.
- Step 5 – Save the new PDF. I named the file as per the above step but changed the extension to .PDF

Executing the Flow
This flow is triggered via a HTTP request with a JSON payload. In this example it was fired using curl from Linux like this:
#!/bin/bash
host="https://prod-84.westeurope.logic.azure.com:443/workflows/..."
curl -v -d @INV_00102707.json -H 'Content-Type: application/json' $host
But it could just as easily be executed from PowerShell like this:
$FlowUri = "https://prod-84.westeurope.logic.azure.com:443/workflows/..."
$PostBody = Get-Content ".\INV_00102707.json"
Invoke-RestMethod -Method Post -Uri $FlowUri -Body $PostBody
Conclusion
Microsoft Power Automate can provide a good solution for automatically generating invoices or other business documents. In it’s live implementation this flow also:
- Saves the document to a custom SharePoint list that holds metadata about the document and makes it easy to find documents again.
- Uses a Sendgrid dynamic template to email the invoice to the recipient and track delivery.
This flow was put into production use and is actually used with a legacy Kerridge system to generate PDF output, functionality that it did not have previously.


Tresor Luvale Major says
Allah Akbar for you, you opened my EYES to see. All worked for me.
Lumiere says
Hi Paul, What if the invoice is a pdf document already and i need to embed my signature image to it
Levin Hao says
Thanks for the sharing. Is it possible to merge the generated PDFs into one PDF or make an action to merge selected PDFs into one without using 3rd party connectors or premium services ?